


I don’t think we’ve ever talked about my slight obsession with all things Baked. As in the Brooklyn bakery owned by Matt Lewis and Renato Poliafito. Theirs was one of my first cookbooks, and it wasn’t even intended for me.
By 2007, I was already “the” baker of my immediately family, but I mostly stuck to cookie recipes that had been in our family for years. Cookies were easy and comfortable for me. Cakes were scary and foreign. I almost never made from-scratch cakes (pound cake Bundts were the sole exception). Decorating layer cakes? Not so much.
Fast forward to Valentine’s Day 2011. My dad, no doubt trying to pique my interest in cooking beyond sugar (nice try, dude), bought me a Williams-Sonoma cookbook about roasting. Don’t get me wrong, I love roasted things. Throw some oil-coated carrots and beets in the oven and I’m one happy camper. But I couldn’t help but be envious of my sister Nina’s gift, a baking cookbook called Baked Explorations. Nina, who has tried to substitute spray butter for actual butter in cookie recipes. Nina, whose flour actually sticks around long enough to go rancid. She got a baking cookbook? Surely, there had been some mistake.
Nina, knowing full well that she can’t bake worth a damn, but still having a strong desire to eat dessert, brought the book over to my apartment so we could “bake a cake together.” By which she meant I would bake a cake and she would lick the batter off the beaters, the bowl, and out of my hair, if need be. We chose the Aunt Sassy Cake, because, duh, pistachios. I was nervous about attempting a layer cake (my one previous attempt had ended in a sloppy puddle of Betty Crocker and Pillsbury defeat), but I figured I had to master the skill sometime.
That time was not when I mastered layer cakes. In our impatience to shove cake in our faces, we didn’t allow the layers to cool. I broke one of them beyond repair because it was still too hot and my pans weren’t properly greased. The frosting never came together on the stove, and when I slapped it onto the steaming cake, it slid right off. We quickly disposed of the ugly cake… into our bellies. Afterwards, I told Nina she should leave the book at my place because I wanted to test out a few more recipes. It resides in my cookbook collection to this day, along with all the other Baked books.
At one point I declared that it was my life goal to make every recipe in that book, but I that quickly fell by the wayside as my amazing cookbook collection grew. There has always been one sticky note poking out of the top of Baked Explorations, though, and it is on the page for Caramel Apple Cake. So when Nina decided on a woodland theme for her daughter’s October birthday, I chimed in with, “Wouldn’t it be AWESOME to make this caramel apple cake? From the cookbook that I stole from you over three years ago?” And she agreed that it would, in fact, be awesome.
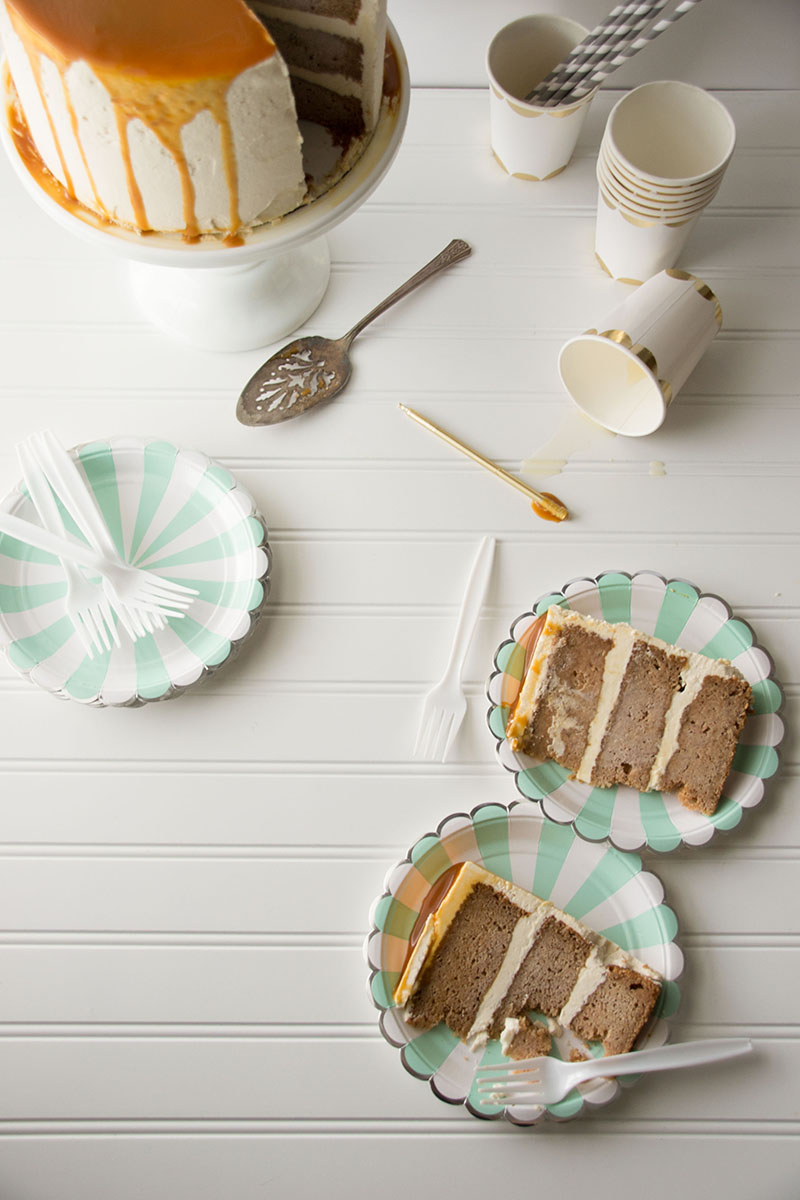
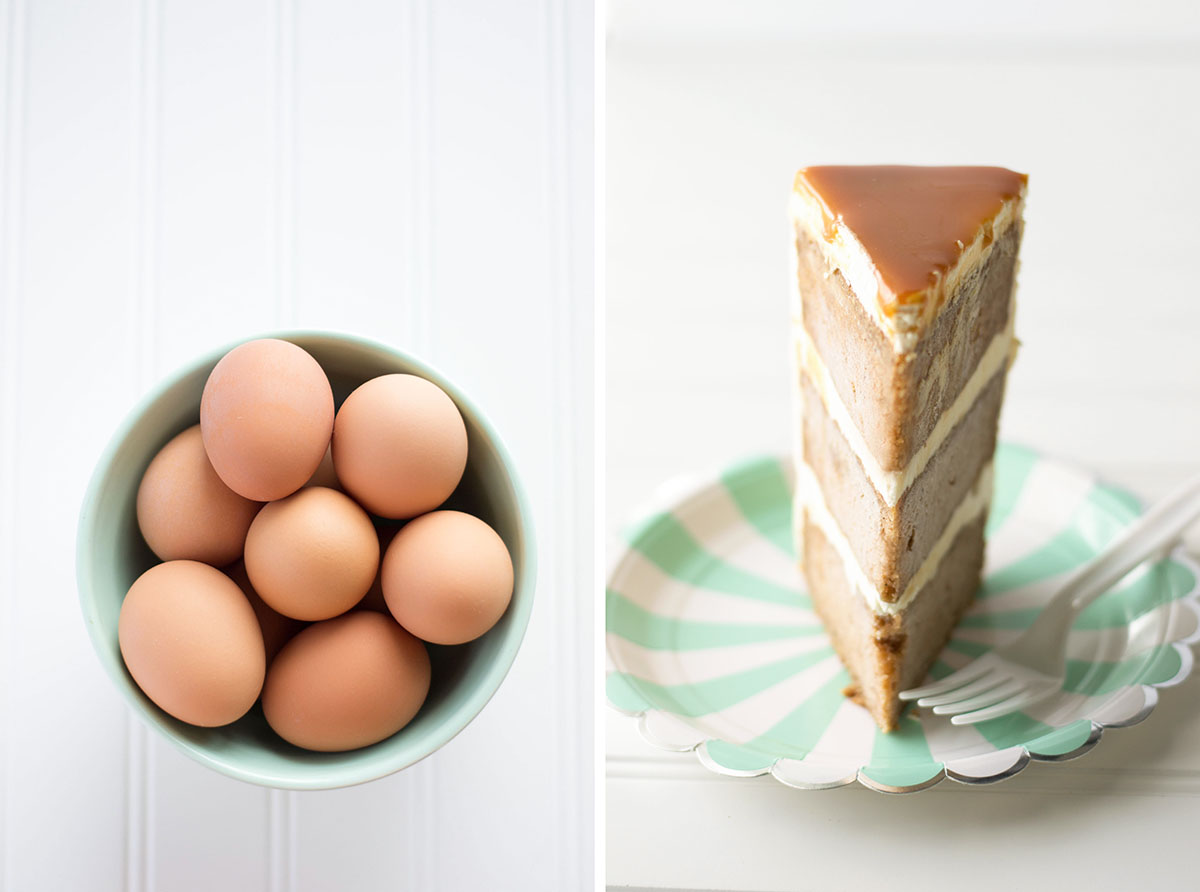
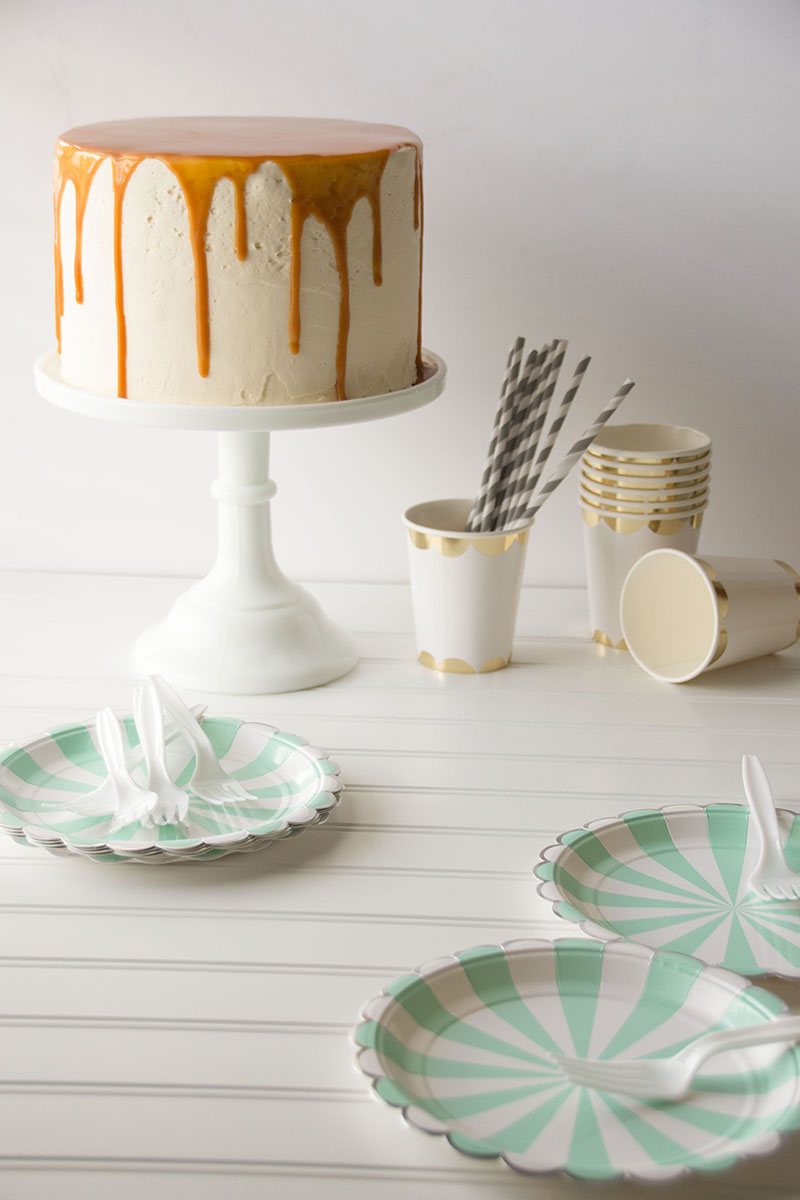
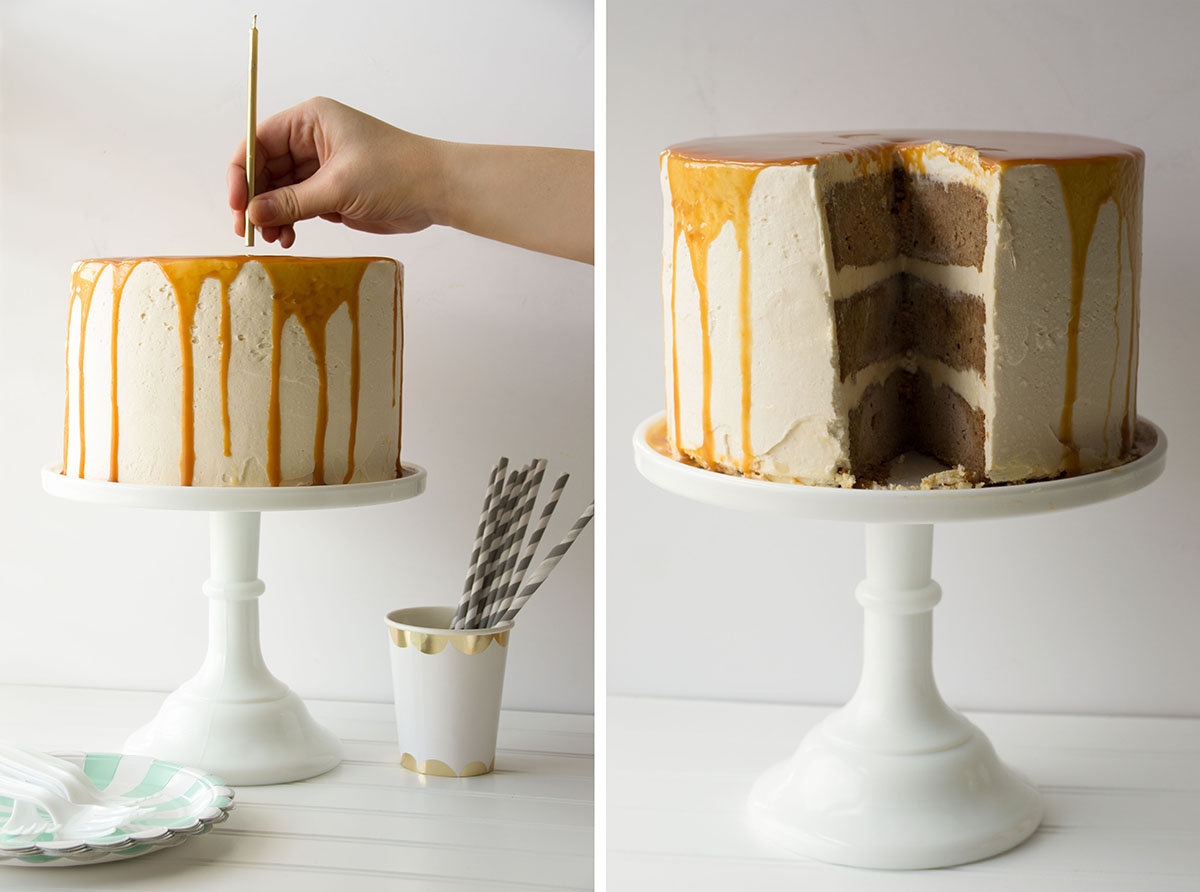
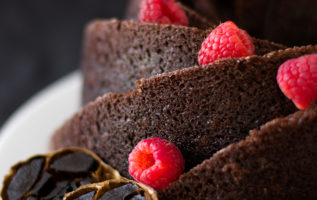
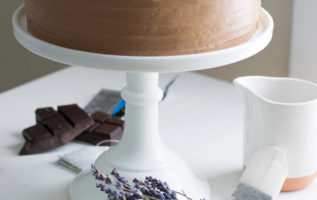
The actual cake for my niece’s party was decorated like a tree stump. I dyed some of the frosting brown, used a fork to swirl it around like bark, stuck some cinnamon meringue mushrooms on top, and set it on a platform of dyed-green coconut “grass.” It turned out pretty good, but whimsical cake decorating isn’t my forte; I prefer more classic styles and clean lines on cakes. So for the second layer cake, I went with straight frosting and a caramel drizzle. I’d say this cake turned out infinitely better than the Aunt Sassy Cake.
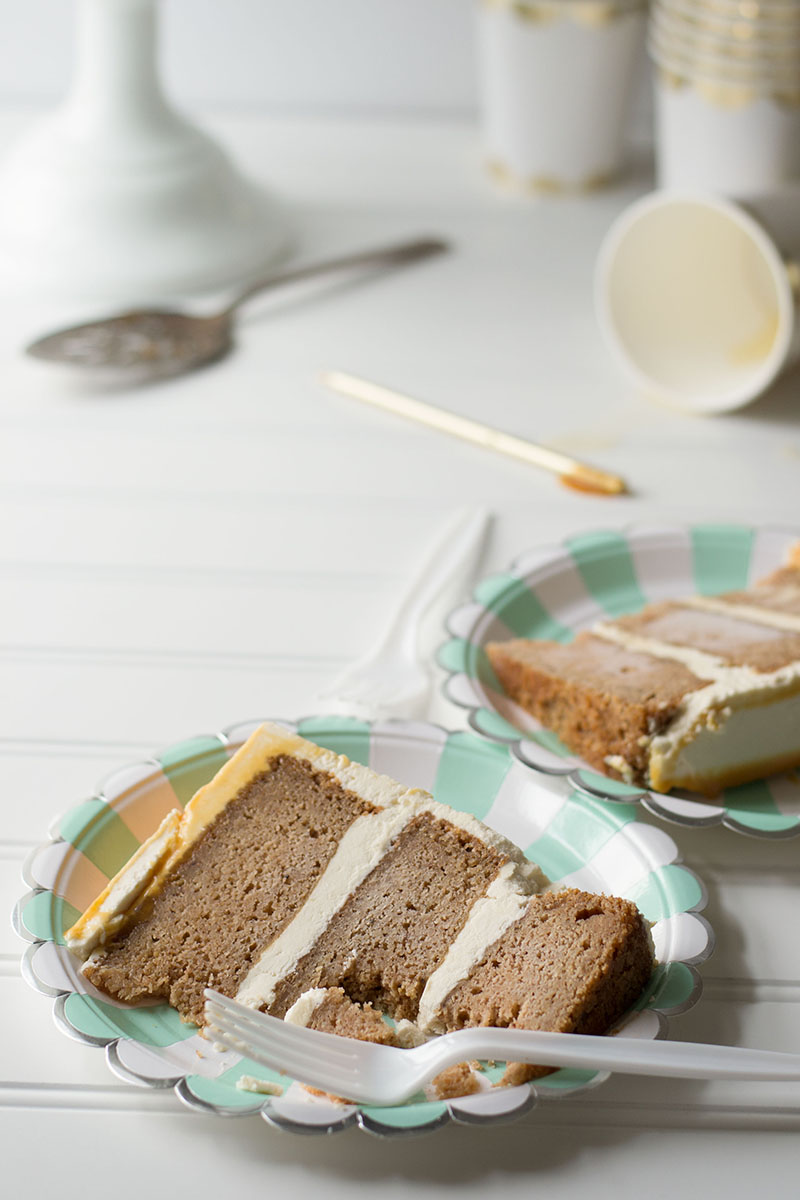
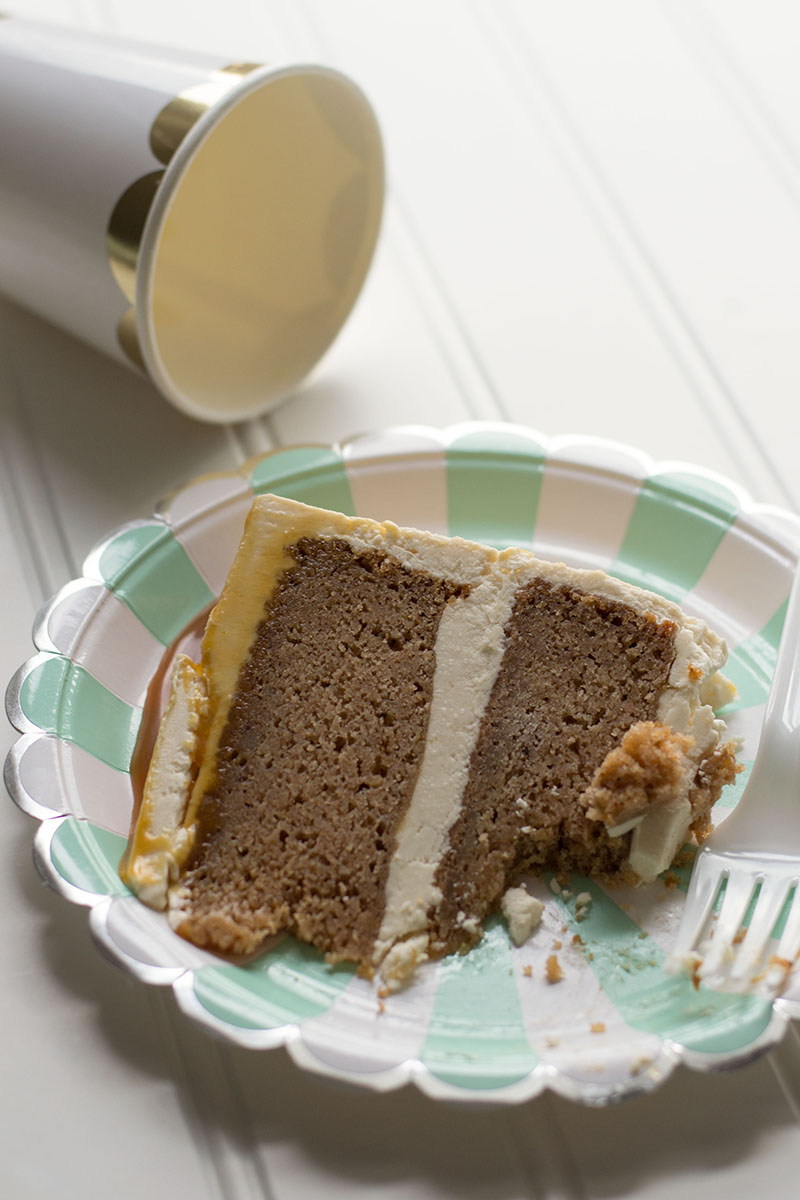
I’m so glad I dog-eared this recipe, because the cake is tuhdiefor. The applesauce makes it super dense and moist, without feeling heavy. I opted for Swiss meringue buttercream instead of Matt & Renato’s Ermine-esque frosting. One day I’ll give the boiled milk frosting another shot, but I wasn’t about to play games with a first birthday party on the line.
About the styling for this shot: Sure, I could have busted out the vintage apple crates and fresh apples and fall leaves. But just because the actual party was woodland themed and she has an October birthday and an apple cake doesn’t mean I can’t still decorate the shoot like a traditional birthday party, right? Metallics and pastels can (and should) totally be a thing in the fall. At least, that’s what I say. I found these cute plates and cups at a newly opened local kitchen store called Cosecha. They had these Toot Sweet brand plates and cups in an adorable display and I just couldn’t help myself. And I’m pretty sure they made the cake taste even better.
CARAMEL APPLE CAKE
- 4 cups (480 grams) all-purpose flour
- 2 teaspoons baking soda
- 1 teaspoon baking powder
- 1 teaspoon salt
- 2 teaspoons cinnamon
- 1 teaspoon ground allspice
- 1 teaspon ground cloves
- 1½ cups (340 grams) unsalted butter, at room temperature
- 2½ cups (500 grams) granulated sugar
- 2 large eggs, at room temperature
- 4 cups (975 grams) storebought or homemade unsweetened applesauce, at room temperature
- 2 cups (250 grams) granulated sugar, divided
- ½ cup water
- ½ cup heavy cream
- pinch of sea salt
- 3 cups (680 grams) unsalted butter, at room temperature
- 8 large egg whites
- 2 teaspoons vanilla extract
- 1 cup (200 grams) sugar
- ¾ cup (175 grams) heavy cream
- 4 tablespoons (60 grams) unsalted butter
- heavy pinch of sea salt
- Preheat oven to 325°F. Brush three 8-inch cake pans with Cake Magic. (Or use your favorite method of greasing cake pans. But seriously, my Cake Magic never fails me.)
- In a large mixing bowl, whisk together flour, baking soda, baking powder, salt, and spices.
- In the bowl of a stand mixer fitted with the paddle attachment, beat the butter on medium-high speed until creamy, about 4 minutes. Add granulated sugar and beat for another 3 minutes, until light and fluffy. Add eggs and beat until combined.
- Starting and ending with the flour mixture, add the flour and applesauce alternately in three additions (i.e. a third of the flour, half the applesauce, flour, applesauce, flour). Remove the bowl from the mixer, scrape down the sides and bottom of the bowl with a rubber spatula (get the bottom really good because butter tends to stick there!), then return to the mixer and mix on low for another 30 seconds or so.
- Divide batter evenly among the three greased pans. Smooth the tops out with your rubber spatula. Place them on the center rack of your oven (they should all fit if you place them in a triangle formation) and baked for 50-55 minutes, rotating halfway through baking, until a toothpick or cake tester inserted in the center comes out clean. Transfer the pans to a wire rack and allow to cool in the pans for 20 minutes. Invert cakes onto wire rack, then flip them over again so the bottom of the cake is on the wire rack. (I recommend doing this because the top of the cake is very moist and may stick to your wire rack, but the cake bottoms won’t.) Allow to cool completely.
- In a medium saucepan, combine 1¼ cups (250 grams) sugar and water. Bring to a boil over medium heat. Brush down any sugar crystals from the sides with a wet pastry brush. Without stirring, continue to cook until sugar syrup is amber in color (or reaches 350°F on a candy thermometer, if you’re using one), swirling the pan occasionally.
- Remove from heat and slowly whisk in cream until smooth. It will sputter up, so be careful! Whisk in salt. Let caramel cool slightly as you make the buttercream.
- In the bowl of a stand mixer fitted with the paddled attachment, beat butter until smooth, about 2 minutes.* Remove bowl from mixer and set aside.
- Place an inch or two of water into a pot and bring to a simmer. In the bowl of a stand mixer, combine egg whites and remaining ¾ cups (150 grams) sugar. Place the bowl over the simmering water, making a double-boiler. Whisk constantly until sugar dissolves and the syrup reaches 160°F. Remove from heat and place on your stand mixer, fitted with the whisk attachment. Whisk on high speed until egg whites are fluffy and the sides of the bowl has cooled down a bit, about 10 minutes.
- Turn mixer speed to low and add butter about cup at a time. When all butter is added, whisk for another minute or two until everything comes together. Switch to the paddle attachment and add caramel and vanilla extract. Mix on low speed until combined and smooth. (If the mixture is soupy at this point, place the bowl in the refrigerator for about 15 minutes to cool down, then mix again until smooth.)
- Measure out your cream and butter and have them at the ready by the stove. Add sugar to a medium saucepan and heat over medium high heat. Move the sugar around with a heat proof spatula or a wooden spoon so that it doesn’t burn to the bottom of the pan. The sugar will form clumps, then melt into a liquid and start to brown. Once all the sugar crystals are dissolved and the liquid is amber in color (or reaches 350°F on a candy thermometer), add the butter and whisk vigorously until the butter is melted. Remove the pan from the heat, and slowly pour in the cream, whisking with your other hand. Whisk until everything comes together and stops bubbling. Pour into a bowl to cool. (The more shallow the bowl, the faster it will cool!)
- Place one cake layer on a cardboard disc. Spread 1-1½ cups of frosting on top. Place another layer on top of the frosting and spread another 1-1½ cups of frosting on that layer. Place the final layer on top. Crumb coat the cake, then refrigerate for 20-30 minutes. Frost the cake with the remaining frosting, then place in the refrigerator to set up for another 15 minutes. Pour cooled caramel sauce on the top and guide it to the edges with an offset spatula so that it drips down the sides. Serve immediately.
- *If you don’t have two stand mixer bowls, you can cut the butter into cubes and add them to the meringue a few cubes at a time.
