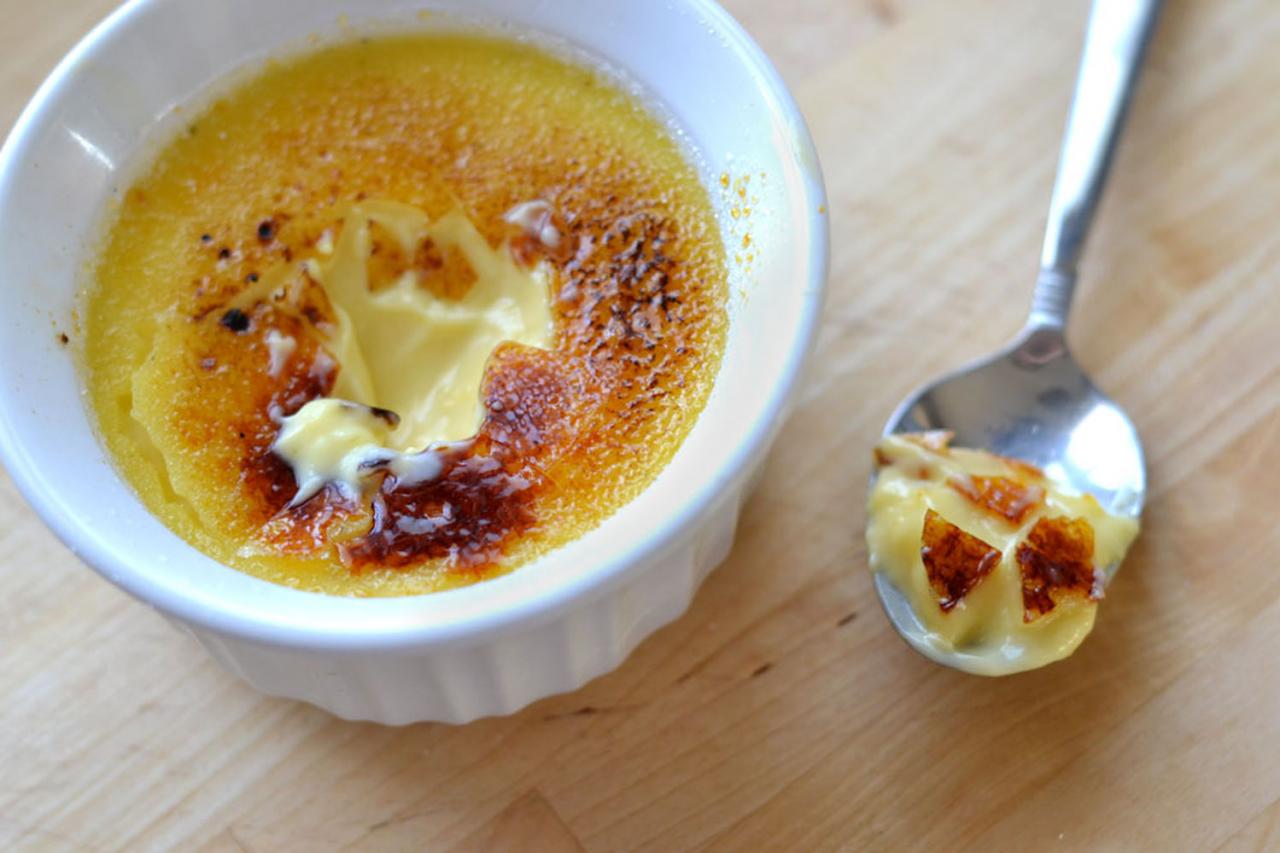
I had never made crème brûlée before yesterday, but I asked for a chef’s torch for Christmas and my mother delivered, as she always does. When I saw her last Saturday, she complained that “it is February and I still have not made her crème brûlée.” Whine, whine whine. It’s like, you force your way out of her uterus, sap her of patience, time, and money for 24 years, and then she wants crème brûlée? Rude.
But since that bloodsucker constantly wants dessert in exchange for her love, I invited her and the rest of the family over for dessert via mass text message. I even threw in dinner (chicken pot pie) to sweeten the deal. My point is, if you make crème brûlée, your mother will continue to love you. At least for another week.
Crème brûlée requires few ingredients, but lots of your precious time. Most of that time is just waiting around, which is really hard because you’ll probably be like, “OH MY GOD WHY IS THERE NOT CRÈME BRÛLÉE INSIDE OF ME YET.”
And then after you get through all that waiting (you’ll get through it, I promise), you’ll burn, like, half of your crème brûlées because you’ve never done it before and why is this happening?
Let me tell you. I tried to search for “how to not burn crème brûlée” with little success. Because the very definition of crème brûlée is burnt cream. So not much luck there. But I finally figured it out: if you are “burning” your crème brûlée to the point where you have what looks like an oil slick on top of your custard, it’s because you’re using too much sugar.
The recipe I was looking at was obviously using those shallow ramekins, and called for a lot of sugar to cover the surface of the custard. I used deep ramekins and the same amount of sugar to cover a much smaller surface area and ended up with totally blackened tops, instead of delicate browned ones. Lesson learned. If you like a slab of thick, burnt sugar on top, pile it on. It doesn’t taste bad, per se, it just isn’t winning any beauty pageants. Either way, it’s really fun to crack with your spoon.
VANILLA BEAN CRÈME BRÛLÉE
- 4 cups heavy cream
- ¾ cup (150 grams) sugar, divided
- 1 vanilla bean
- 7 egg yolks
- ¼ teaspoon coarse salt
- up to ¾ cup sugar for topping
- Preheat oven to 300°F. In a medium saucepan, add cream and half of sugar (¼ cup plus 2 tablespoons, or 75 grams). Split vanilla bean lengthwise and scrape seeds into cream, then add pod. Heat over medium until mixture begins to bubble at the edges.
- Meanwhile, bring a pot of water to boil. In a large mixing bowl, whisk together egg yolks, remaining sugar, and salt.
- When heated, remove the vanilla bean pod and pour a small amount of cream mixture into egg yolk mixture, whisking constantly with your opposite hand. Pour another small amount of cream in, continuing to whisk. Slowly add the remaining cream mixture, whisking the whole time. The idea is to temper the eggs by gradually bringing their temperature up. If you add the hot cream all at once, you’ll get scrambled eggs.
- Pour custard through a fine mesh sieve into a large measuring cup or mixing bowl. This will get out any cooked eggs and large pieces of vanilla bean.
- Divide custard among 8 ramekins. Place in a large baking dish or roasting pan. Place pan on center rack in oven, then pour boiling water into the pan until it comes about halfway up the sides of the ramekins. Bake until custards are just set, but still shake a little in the middle, about 30-40 minutes for shallow dishes, longer for deeper ramekins (mine took about 50 minutes).
- Carefully remove pan from oven so you don’t splash water onto your custard. Remove ramekins with a pot holder or tongs to a wire cooling rack and let cool 30 minutes. Cover and move to the refrigerator; chill for at least 2 hours or up to 3 days.
- When ready to serve, remove from refrigerator and sprinkle sugar on the tops of the custard. There should be slightly more sugar than what just covers the surface. For my ramekins, this was about ½ tablespoon each.
- With your torch about 1-2 inches away from the top of the custard, flame the top in a circular motion until the sugar liquefies, turns brown, and runs together. The top will harden within a few seconds after you take the flame away. Serve immediately.


