The feast is over, and you are as stuffed as that turkey that’s now stuffed inside you. Now it’s off to a comatose state in front of the TV or, if you are one of those insane ones, off to bed so you can be up in a few hours for the Black Friday pandemonium. Oh, and then there’s that carcass, the culinary wreckage of a feast that only comes once a year.
Most people will just toss those bones and any scraps of meat left on them in the trash without a second thought. But did you know that you can actually resurrect them, giving new life to what is otherwise considered waste? Bones, believe it or not, are a crucial component to classical cooking. After they’ve been picked to, well you know, bones can be simmered in water to make stock. Stock, of course, is the base liquid for myriad other dishes in the culinary world, most often soups and sauces.
In fact, according to The Culinary Institute of America’s “The Professional Chef,” stocks “are referred to in French as fonds de cuisine, or the foundations of cooking.”
While this all may sound a little upper-crust, stocks are actually a cinch to make. At their most basic, all it takes to make stock are bones, water and some vegetables such as carrots, onions and celery. Oh, and time. A 30-minute meal, this is not. Stocks are velvety and flavorful because they extract the last remnants of life from those bones. And that takes time. A classical white stock made from veal bones, for example, can take up to 10 hours. Luckily, bones from fowl such as chicken or turkey take about half that, from four to six hours. (Fish stocks, on the other hand, made from the delicate bones of those swimmers, is done in 30 minutes to an hour, and is often called fumet).
Luckily, stocks are low-maintenance. It’s not like you have to stand over the pot the whole time stirring, like some sort of risotto from hell. No, all you really have to do is simmer the ingredients and skim the scum that floats to the top occasionally. Once done, you strain and chill promptly. Stock such as this one we’ll make can then be used to in soups or, one of my favorite applications, instead of water when making rice.
By the way, while “stock” and “broth” are often used interchangeably, technically broth is made with meat, while stock uses bones. The contents of your turkey carcass will likely have a bit of both. Stocks tend to have more mouth feel because of the gelatin that is extracted from the bones. It is also for this reason that, once refrigerated, a well-made stock thickens like Jell-O. Don’t worry, this is normal and will thin out when heated.
Also notice that in the recipe below, measurements are not exact, since no two carcasses are the same. Just use what you have and throw in the vegetables as you have them; one less carrot will not ruin this recipe. The most important ingredient for stock is time. Also note that salt is generally added only in small amounts or not at all, since stocks are used as a base for other dishes, and not necessarily something you eat by itself.
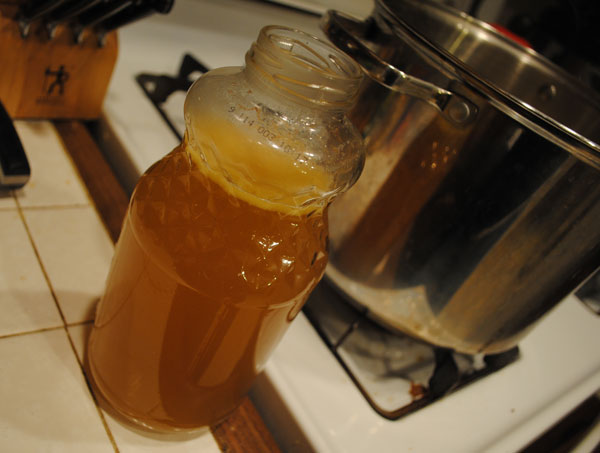
The pictures below are from two chickens vs. one turkey, as that’s what I had on hand. You can really use any type of bones that you have. Here’s how to make it happen:
TURKEY STOCK
- Bones of one turkey, including leftover meat
- Enough water to cover by two inches in a pot
- About 3 celery sticks, roughly chopped
- 1 brown onion, quartered
- 2 carrots, roughly chopped
- Optional: whole peppercorns, garlic cloves, and other flavorings
Step 1: After rescuing most of the meat and skin from the turkey carcass, put the bones in a large (at least 8-quart) stock pot and cover with cold water by about two inches. Starting with cold instead of hot or boiling water will create a clearer, more flavorful stock.
Step 2. Set on medium heat and bring to a simmer, skimming and throwing away the impurities often referred to as “scum” as needed. Once a simmer is attained, regulate the heat so the liquid simmers – where bubbles gently reach the surface – instead of boils. Simmer uncovered for three to five hours, skimming as necessary and adding more water if needed to cover the bones.
Step 3. About an hour before you plan to strain, add the vegetables and any additional aromatics such as peppercorns and garlic. Simmer uncovered for about another hour.
Step 4. OK, when do you know when it’s done? Taste it. When it tastes good to you, it’s done – and remember, flavors will intensify once chilled. Now carefully strain using the finest strainer you have (a liner of cheese cloth works best if you have it).
Step 5. Cool the stock as quickly as you can (multiple jars help here) and refrigerate for up to four days. I speed the cooling process by putting the jars in the same pot I made the stock in, but cleaned and filled with very cold water. Once chilled, a layer of fat will likely coagulate at the top; just skim this off with a spoon and toss after the stock has chilled.
Congratulations: You just made stock from scratch using parts of your turkey most others would have sacrificed to the trash can. Now that you know how to make turkey stock, experiment with other stocks using beef, chicken or fish bones, or even with various vegetables for a vegetarian version. Stocks also freeze well and defrost quickly, so it’s easy to keep on hand throughout the year.
Source: iwanttocook.com (defunct blog)


